Cultivate Your Cardstock Green Thumb with New Propagation Garden from Annie Williams!
- gracethrufaithgoods
- 04/12/2024
- DIY Tutorials
Hello close friends! Emily Midgett from Sixth Road Sundries is listed here with you currently, and I’m pretty satisfied to be a visitor in this article on the Spellbinders weblog! My partner usually jokes that the only way I can mature anything inexperienced is on a card, which is 100% accurate. I have ordered and been supplied numerous a wonderful plant in my life time only to have them regrettably wither away. So several men and women began building their individual miniature greenhouses all through the pandemic, and so it will make sense that Spellbinders built the Propagation Backyard garden products suite to rejoice these fortunate individuals with environmentally friendly thumbs! I have created a trio of tasks with the new items showcasing a abundant gold-and-inexperienced coloration palette. Let’s get commenced with the particulars!
Inexperienced and gold sometimes can be reminiscent of St. Patrick’s Working day for me, but I identified the mix completely luscious when paired with the sensitive die cuts and Much better Press plates in the new Propagation Garden product suite. I pulled out Fern and Forest cardstock from Spellbinders, together with some shining Gold Mirror cardstock and then a couple of glittery coordinating accents from my stash to develop this coordinating trio.
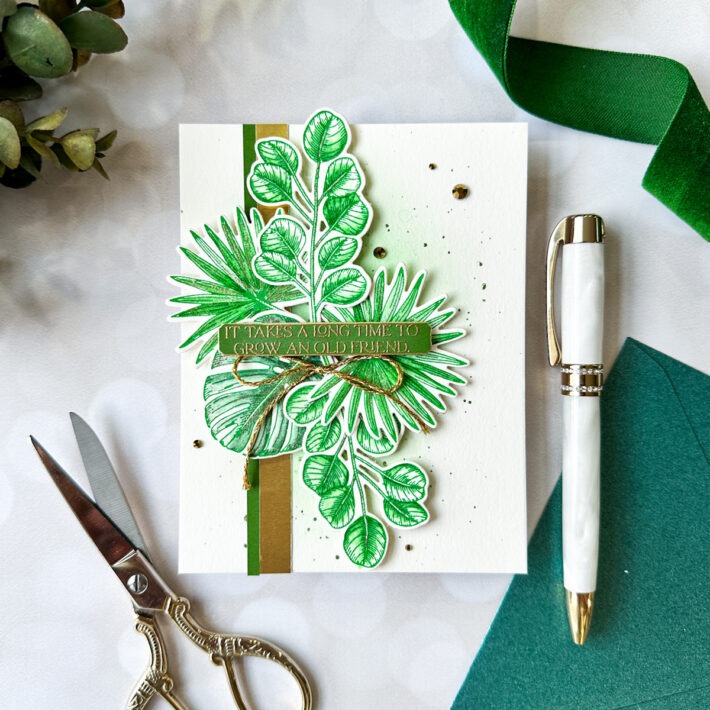
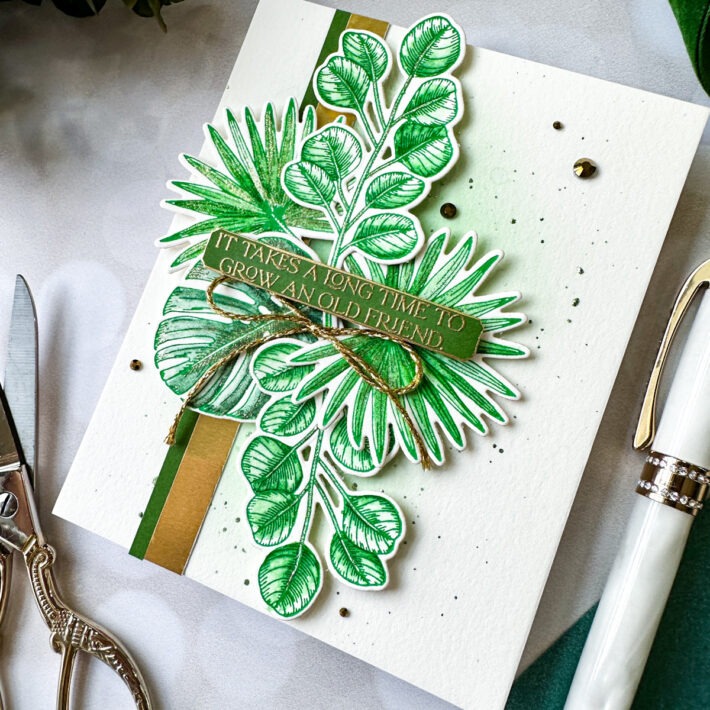
My initial card takes advantage of the fantastically in-depth new Tropical Leaves Much better Press Plate and the waterproof mother nature of the Improved Push inks! I utilised my pan watercolors to add some vivid greens to the letterpress photos, creating this eclectic “bouquet” of foliage.
- Initially, impress the distinct leaf illustrations or photos from the Tropical Leaves Push Plate established on to Porcelain Far better Push Paper utilizing Leaf Improved Press Ink.
- Employing your most loved watercolors, insert shadows and information to the letterpress illustrations or photos, developing an pretty much no-line seem with the tone-on-tone colors.
- Die reduce the illustrations or photos with their incorporated coordinating dies.
- To produce the card base, use a blending brush to mix some of the Leaf Greater Press Ink on an A2 panel of the Porcelain Better Push Paper, then splatter with metallic gold watercolors.
- Trim down a strip of Metallic Gold Mirror cardstock as very well as a thinner strip of Fern cardstock and adhere to the blended card front, orienting the strips to the still left of the panel.
- Set up the foliage die cuts on the card entrance and adhere with foam adhesive, enabling them to “radiate” out from a central issue.
- Warmth emboss and die lower a greeting from the Propagation Yard Sentiments established working with gold embossing powder on Fern cardstock, then operate a metallic gold leaf marker around the edge of the die slash for a gilded impact.
- Increase a shimmering gold wire ribbon and some golden gems for additional sparkle.

This following card normally takes advantage of the charming specifics on the new Leafy Helix embossing folder, embellishing with some ink mixing and swipes of pigment ink.
- 1st, trim down a panel of 3 ¾” x 5” Fern cardstock and ink mix some coordinating deep inexperienced ink all over the edges with a blending brush.
- Operate the blended panel via your Platinum 6 with the Leafy Helix folder.
- Lightly swipe a white pigment ink pad more than the raised layout on the panel, then swipe a metallic gold pigment ink pad straight about the white ink, creating a multi-colored outcome on the pattern.
- Trim a piece of Metallic Gold Mirror cardstock to be the tiniest little bit much larger than the blended panel, matting the patterned piece with a skinny gold body.
- Adhere both of those items to an A2-sized Fern card front employing strong double-sided tape.
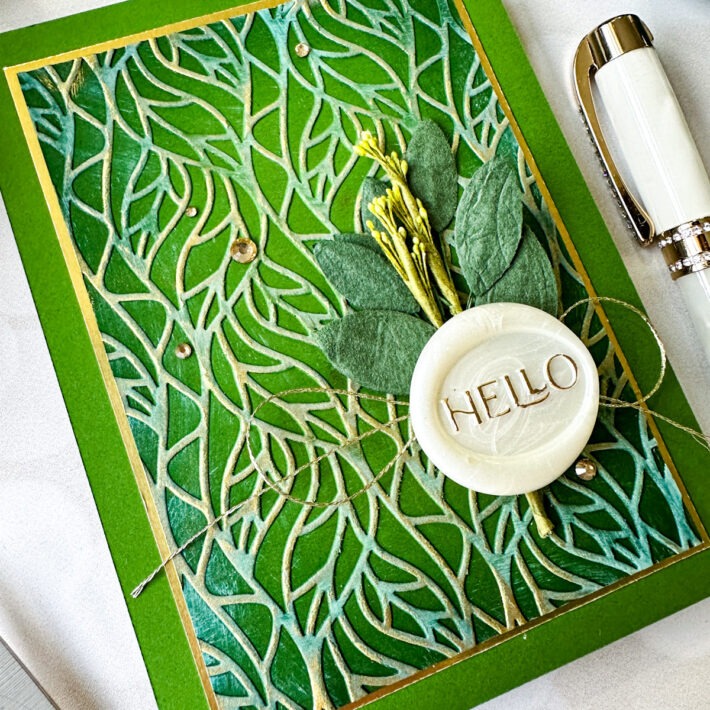
To permit the embossed background to be the star of the present, a very simple “hello” greeting on the new Hi there Wax Seal from the Propagation Yard collection is just about all that you require!
- Employing white pearl wax beads, produce the wax seal with the Hi there Wax Seal.
- As soon as hardened, use a gold marker to lightly embellish the raised sentiment and build a lavish distinction involving the letters and the smooth pearlescent track record.
- Making use of a Wax Seal Adhesive Circle, prepare some leaf die cuts or pre-created leaf elaborations (located in the floral section of my regional craft keep) and a metallic gold twine bow and adhere at the rear of the wax seal.
- Adhere the embellished wax seal to the entrance of the card with your option of adhesive.
- Embellish the card entrance with Gold Combine Adhesive Gems for just one final contact of sparkle.
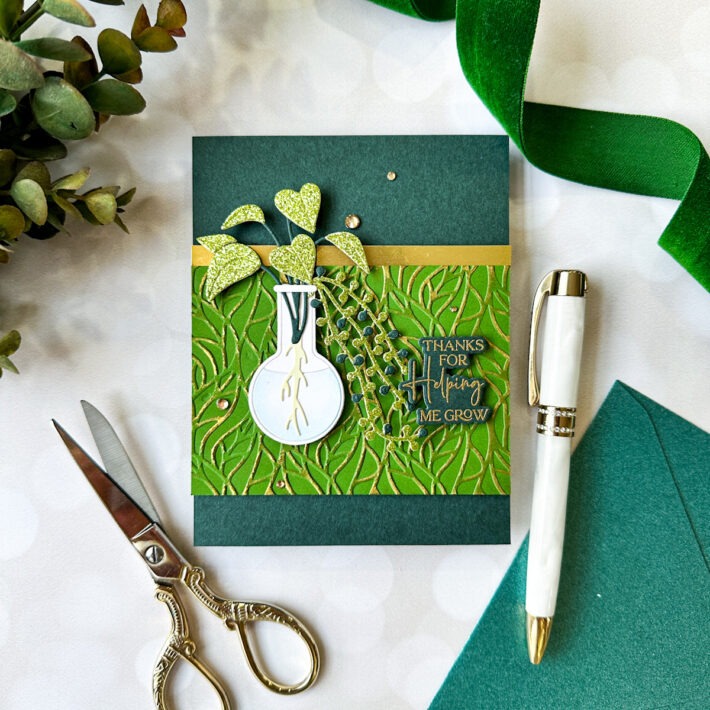
For my final venture, I put to use some of the intricate die cuts from the Laboratory Glassware and Propagated Plants sets to generate this in-depth little planter with the accompanying sentiment, ideal for a trainer reward!!
- Die minimize the details from the Laboratory Glassware and Propagated Crops, cutting the individual leaves from inexperienced glitter cardstock and frivolously mixing some pale blue ink all around the edges of the “water” die lower.
- Adhere all of the die-slice parts collectively with liquid adhesive.
- Warmth emboss a greeting from Propagation Back garden Sentiments employing gold embossing powder on Forest cardstock, then die minimize with the coordinating die.
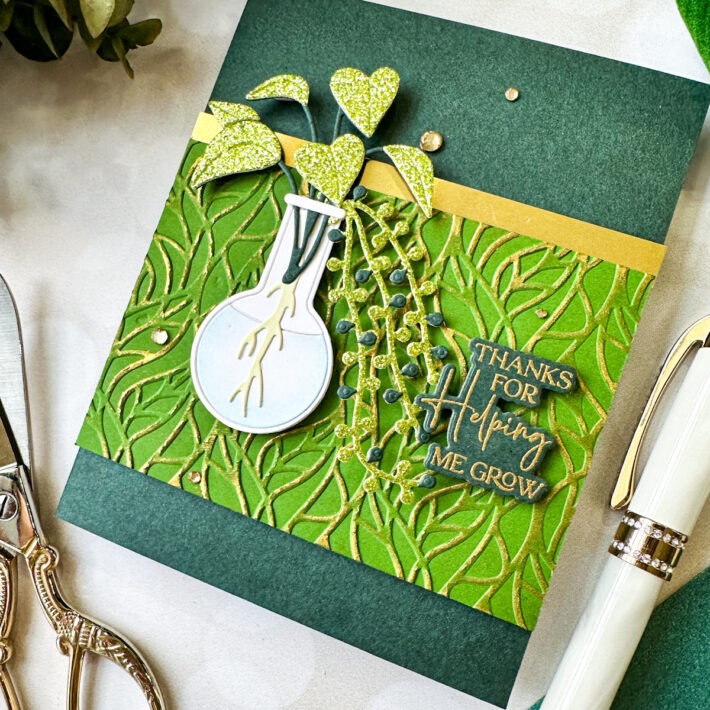
- Run a panel of Fern cardstock as a result of your Platinum 6 using the Leafy Helix embossing folder, then swipe a gold pigment ink pad more than the best of the elevated photographs to assist them stand out and incorporate some high-class shimmer to the track record.
- Trim the embossed panel down and slash a strip of gold mirror cardstock.
- Adhere the embossed panel and the gold strip to an A2 Forest card entrance making use of liquid adhesive.
- Pop up the planter applying foam adhesive and tuck the sentiment future to the gracefully floating vines.
- Incorporate some gold gems for included sparkle!
Effectively, which is all for my projects today! Many thanks so a great deal to Spellbinders for the possibility to participate in with these stunning new goods. If you’d like to see additional of my do the job, you can test out my blog site at emilymidgett.com. Many thanks so a lot for stopping by nowadays, and have a marvelous working day!
Spellbinders Supplies:

/*
/*
/*
/*
/*
/*
/*
/*
/*
/*
/*
/*
Other {Supplies|Provides|Materials}
Simon {Says|States|Claims|Suggests} Stamp Kale Ink, Hero Arts Dusty Blue ink, Altenew Antique Gold Pigment Ink, pan watercolors, metallic watercolors, foam adhesive, {green|eco-friendly|inexperienced|environmentally friendly} glitter cardstock, gold embossing powder,