DIY : How To Make Your Own Frame For Punch Needle
- gracethrufaithgoods
- 05/10/2024
- DIY Tutorials
In the world of punch needle embroidery, one fundamental truth prevails: for your project to turn out as beautifully as you envision, the fabric must be pulled tight and be taut. Achieving this level of tension is important for the final result to be nothing short of pretty. However, if you’ve ever attempted punch needle using an embroidery hoop, you’re well aware of the struggle that can ensue. While embroidery hoops are a common tool in the needlework world, they often fall short when it comes to providing the necessary level of tension for punch needling. That’s why I decided to make my own DIY punch needle frame, and I will show you how you can make one for yourself too! So Let’s go!
Material Needed – DIY Punch Needle
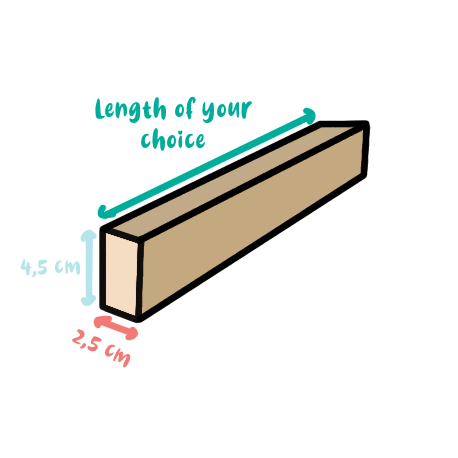
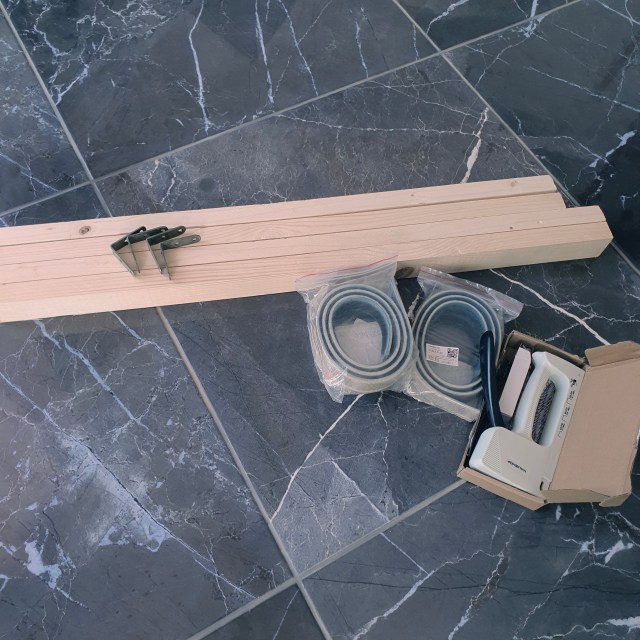
4 rectangular wooden batten (dowels), one side is 2,5 cm, the other side 4,5 cm. As for the length, you have the freedom to choose the size that suits your needs. Personally, I wanted a square-shaped frame and opted for a larger size. So I went with 80 cm length for the top and bottom of the square, and 75 cm for the sides.
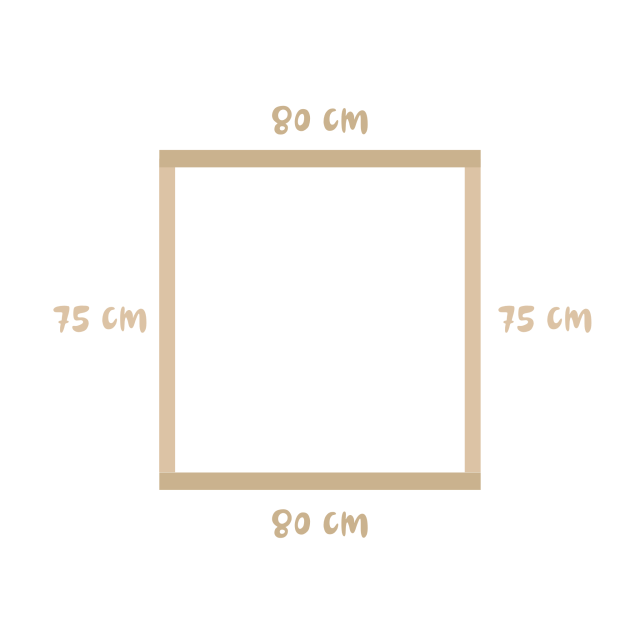
Gripper Strips, measure the number of centimeters you need to encircle your frame. Keep in mind that grippers don’t need to be attached to the corners. In my case, I needed a total of 4 lengths of 75 centimeters each.
Some nails (they should not be longer than 2 cm) and a staple gun heavy duty to attach the grippers to the woods.
4 metal brackets to attach the piece of woods together.
A spokeshave, a cutter or any cutting tool to round the edge of the wooden batten, and some sand paper to smooth it out.
Cut resistant gloves, a hammer and a screwdriver (electric is the best for this project).
Most of the supplies needed are available on Amazon, I have a page where you can find them easily here: Amazon Storefront
** The words highlighted in blue are direct links to products on Amazon.com. As an Amazon Associate, I earn from qualifying purchases. This means that when you click on links to various products on this site and make a purchase, this can result in a commission that is credited to this site. This helps support the maintenance and growth of Atelierdelilah.Com, at no additional cost to you. Thank you for your support! **
Step 1 : Prepare your wooden bars – DIY Punch Needle
To prepare my wooden bars, I began by rounding one corner of each one of them using a cutter (you may use a spokeshave for a cleaner result). This rounded edge is pivotal as it allows the gripper strips to bend smoothly over these corners, creating a snug fit and a secure hold on the fabric. Once the rounding is complete, it’s imperative to take a moment to sand the rounded edges, ensuring that they are smooth and free from any rough or sharp edges.
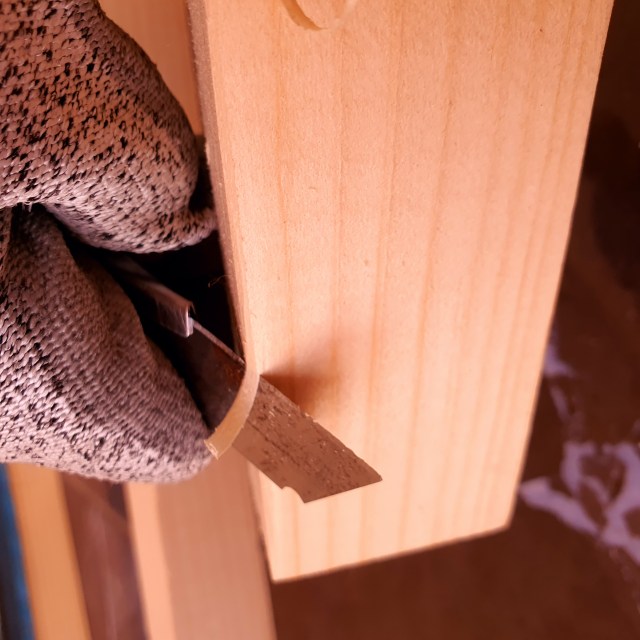
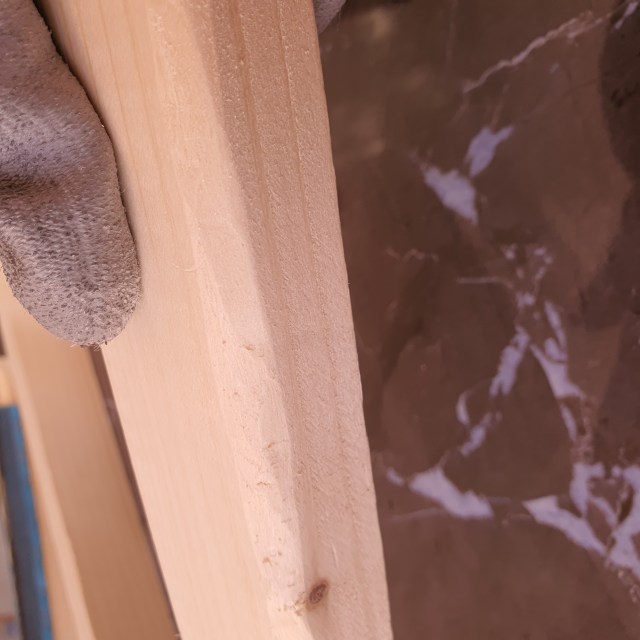
Round only 1 corner on each wooden bar.
Step 2 : Attach the Gripper Strips to the wooden bars
First of all, I highly recommend you to bend smoothly the back of your strips to loosen them up. As they are really stiff, it would be difficult to nail them down the wooden bar if we didn’t do this first. Do it several times to make sure it’s easier to manipulate and bend on the rounded corner of the wooden bars later on.
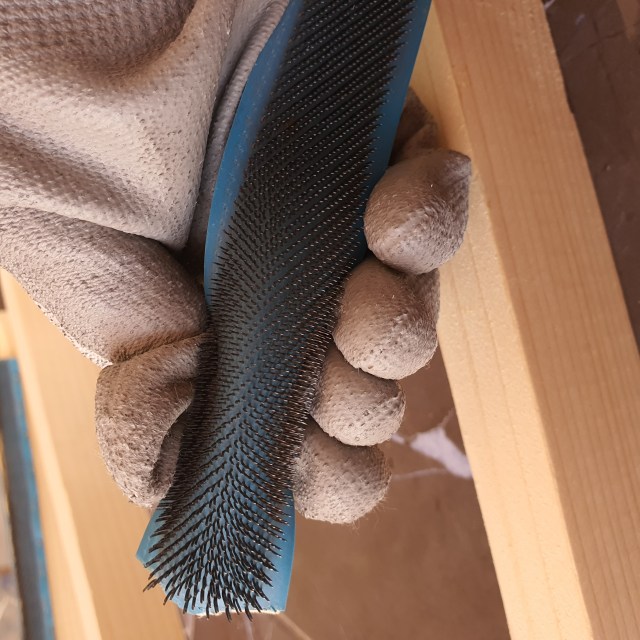
Secondly, you have to know that there is a way to place your strips before nailing them. If you look closely your gripper strips, you will notice that the “teeth” on the gripper are actually slightly curved, this will allow them to grip the fabric. So make sure that the teeth are facing away from the middle of the frame.
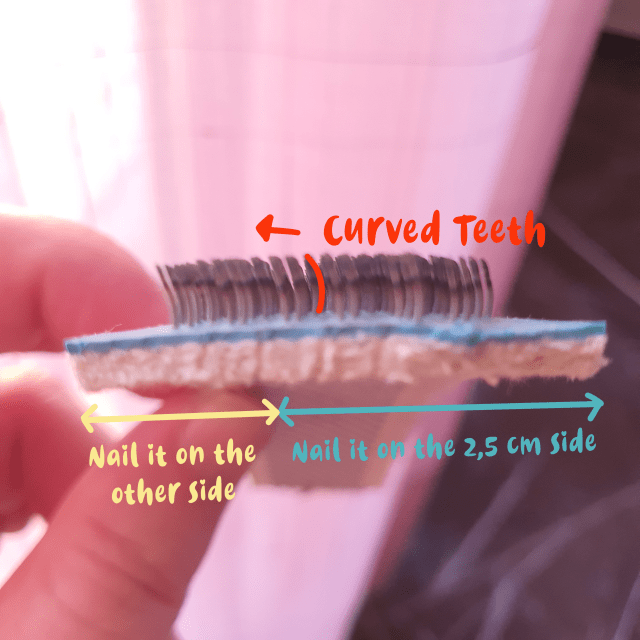

Now to attach the grip to the bar, I recommend you to start with a nail at the beginning of the grip, followed by 2 staples, then a nail again (see pictures below). Start with the 2,5 cm side of the wooden bar. On this side, the major part of the grip should be attached. Bend the grip over the rounded corner, then nail down the other side of the grip to the bar, as shown in the pictures above. Do this until the end. You can add more nails if needed.


Do this on the 4 wooden bars.

Step 3 – Connect the bars together to form the frame
Lay out the bars in a square shape, with the longer bars forming the top and bottom, and the shorter bars forming the sides. Once you’re satisfied with the frame’s alignment, use your metal brackets and screws to secure the corners together. Make sure that the teeth of the grippers are all facing away the middle of the frame before.

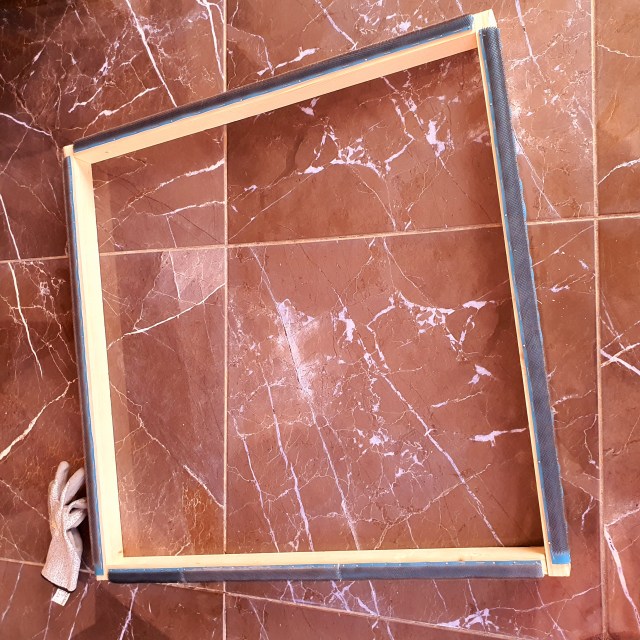
And voilà, your frame is ready to be used!
I’ve been using mine ever since I’ve made it, and it completely improved my punch needle experience. I was struggling big time with the hoops I was using. I would lose all the tension, the fabric would slip away from the hoop and it was a real misery to constantly pull it to taut it. With this frame, the fabric stays tight, the loops are gorgeous, and I can easily punch needle and do it faster than before. If you encounter the same problem as I did, this is your solution!
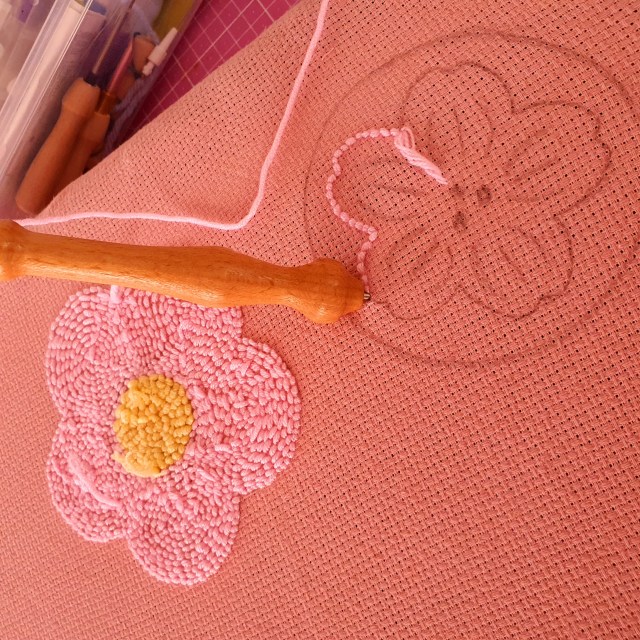
Lastly I wanted to share with you that I have 2 FREE punch needle illustrations that you can download now, one is for a coaster, the other one is for wall decor. You can find them on my creative fabrica and gumroad stores here: and here:


Credit:
Wall background of the article illustration: Image by rawpixel.com on Freepik
The post DIY : How To Make Your Own Frame For Punch Needle appeared first on Atelier Delilah.
