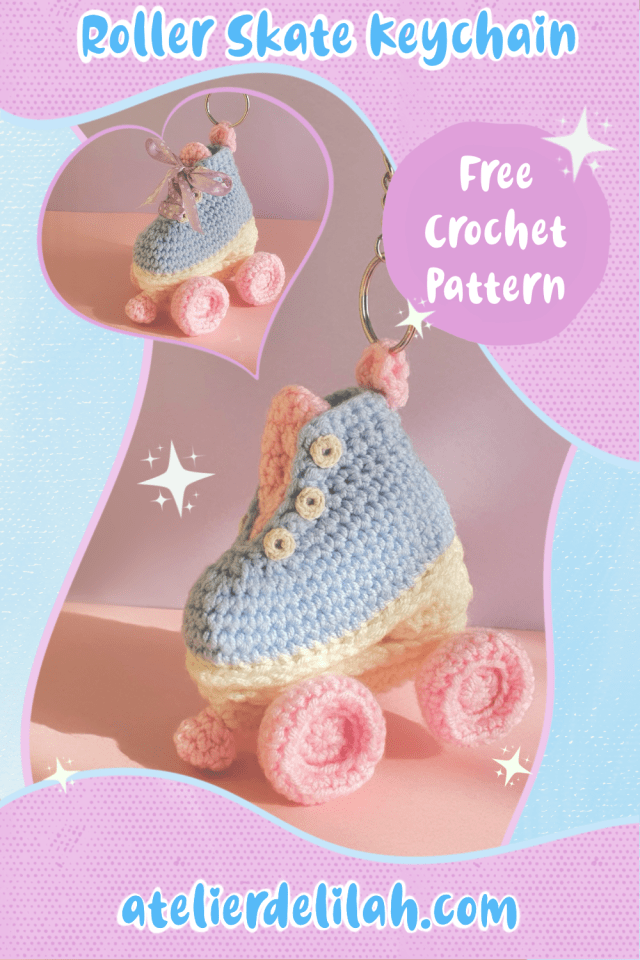
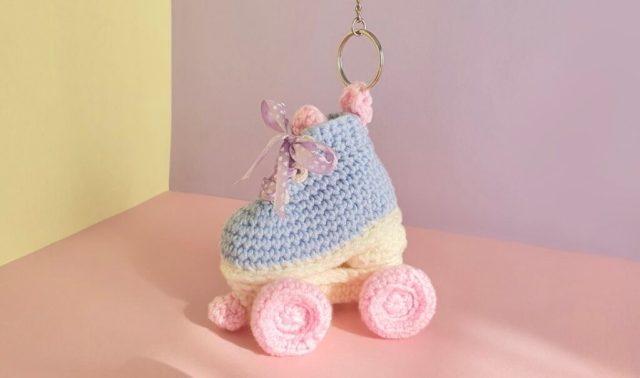
Let’s Crochet This Colorful Roller Skate Keychain For Your Bag
- gracethrufaithgoods
- 05/09/2024
- DIY Tutorials
Oh, the roller skate – talk about a blast from the past! I can vividly recall the exhilarating feeling of freedom, the wind tousling my hair as I navigated the streets with the grace only a child possesses. I still remember the day at school when a collision on skates resulted in my first-ever cast. This memory brings back the bold and daring spirit of my childhood, inspiring the resilient adult I am today. As I picked up my crochet hook to fashion a miniature roller skate for my bag, each stitch is a gentle tug on the strings of nostalgia. Eager to revisit the cherished moments of your childhood and savor the delightful nostalgia they bring? Join me as we weave together yarn and memories, and let’s create this Crochet Roller Skate now!
Material – Crochet Roller Skate
- Acrylic or Cotton yarn (sport weight) of 3 colors: blue, ecru and pink. 1 skein each will be more than enough. Click the colors to access amazon links to the yarns I’ve used for this project, if you want to use the same ones.
- Some ecru DMC thread for embroidery (3 strands), 6 times 31 cm long
- a 4 mm and 1,75 mm crochet hooks
- 5 mm jump rings x6
- polyester fiberfill for stuffing
- a keychain swivel clasp
** The words highlighted in blue are direct links to products on Amazon.com. As an Amazon Associate, I earn from qualifying purchases. This means that when you click on links to various products on this site and make a purchase, this can result in a commission that is credited to this site. This helps support the maintenance and growth of Atelierdelilah.Com, at no additional cost to you. Thank you for your support! **
Abbreviations – Crochet Roller Skate
ch: chain
sc: single crochet
hdc: half double crochet
sl st: slip stitch
sc3tog: 3 single crochet together, here it’s a decrease of 3 stitches together into 1.
inc: increase
dec: decrease
BLO: back loops only
FLO: front loops only
R: row / round
Notes:
Every row ends with a ch 1 then turn, and every round ends with a slip stitch. The whole pattern is made with the 4 mm hook except for the boot’s eyelets, which are made with the 1,75 mm hook.
The yarn gauge for this pattern is: 5 cm x 5 cm = 10 stitches (sc) x 10 rows.
The full crochet tutorial video is now available on my youtube channel! The video is embed at the end of the article down below if you are interested.
Crochet Roller Skate Keychain Pattern
The boot’s sole
Ch 13, starting the 2nd loop from the hook:
Round 1: 11 sc, 4 sc in the last stitch, continue working on the other side of the chain base: 10 sc, (3 sc in the last stitch – which is the 1st one we worked in). (28)
Round 2: hdc inc, 3 hdc, 4 sc, 3 hdc, hdc inc, (1 sc, 1 hdc) in the next stitch, (1 hdc, 1sc) in the next stitch, hdc inc, 3 hdc, 4 sc, 3 hdc, hdc inc, 2 sc (34)
R3: 1 sc, hdc inc, 8 sc, 2 hdc, 3 sc, (1 sc, 1 hdc) in the next stitch, (1 hdc, 1 sc) in the next stitch, 3 sc, 2 hdc, 8 sc, hdc inc, 1 sc, sc inc x2 (40)
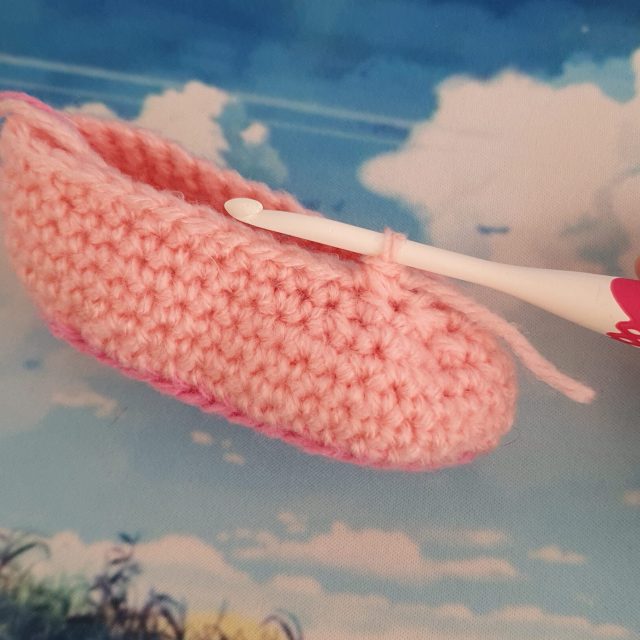
Here’s the foundation for the boot’s sole. Crochet two identical pieces following these instructions. For one piece, cut the yarn and secure it after completing round 3. Meanwhile, for the second piece, we’ll continue building up the top of the boot from this base.

Switch to a new yarn color and continue crocheting on one of the sole pieces:
R4: Work this round in the Back Loops Only of the stitches: 2 sc, sc inc, 13 sc, sc inc, 2 sc, sc inc, 13 sc, sc inc, 6 sc (44)
R5 to 7: 44 sc (44)
R8: 14 sc, sc dec, 3 sc, (sc dec) x 3, 3 sc, sc dec, 14 sc (39)
R9: 13 sc, sc dec, sc3tog, sc dec, sc3tog, sc dec, 12 sc, sc dec (31)
Cut the yarn and make an invisible join to finish the round.
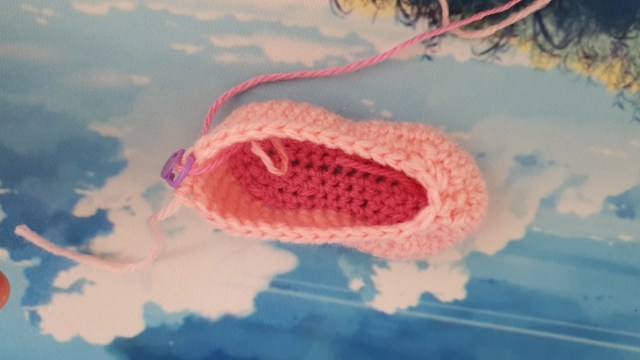
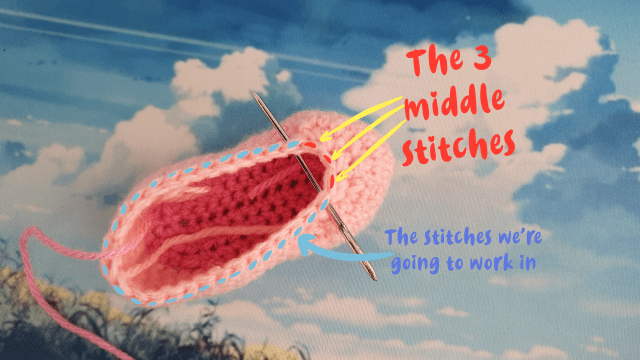
Identify the three middle stitches that form the rounded front of the boot and leave them unworked. Join the yarn with a single crochet decrease on the right side of the boot, commencing with the first available stitch after the three middle stitches. And now we’re going to work in rows:
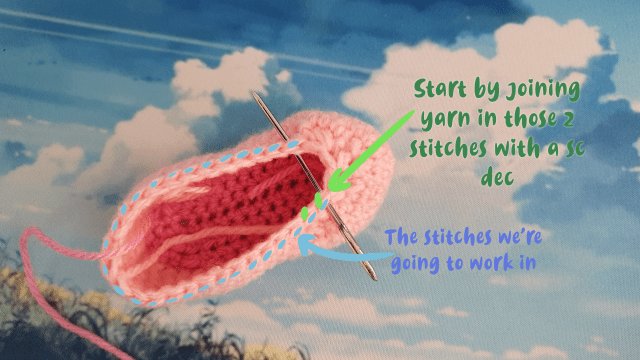
Row 10: sc dec (the one we did to join the yarn back), 24 sc, sc dec (26)
R11: sc3tog, 20 sc, sc3tog (22)
R12: sc3tog, 16 sc, sc3tog (18)
R13: sc dec, 14 sc, sc dec (16)
R14: 16 sc (16)
R15: 5 sc, sc dec, 2 sc, sc dec, 5 sc (14)
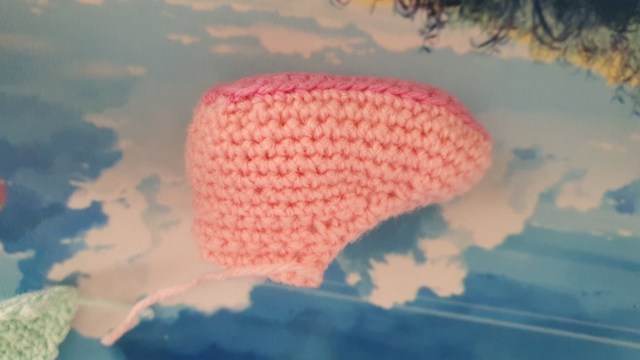
Chain 1 and proceed to outline the rows we’ve previously crocheted. This step is crucial for establishing the framework where the eyelets, the openings for the laces, will be situated. Do as follow: ch1, 6 sc, 3 sl st in the 3 central stitches we left unworked, 6 sc, chain 1 then cut the yarn and make an invisible join to finish the row.
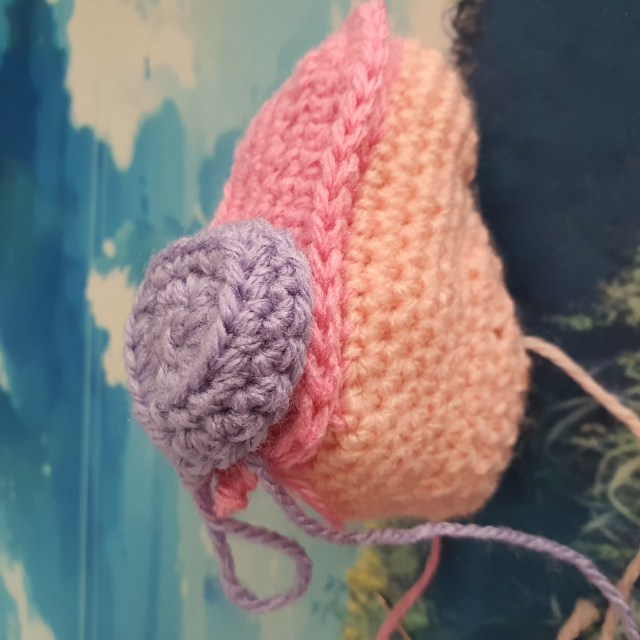
After completing the boot, take the second sole we’ve made earlier and sew it underneath the boot, combining it with the first sole to add thickness to it.
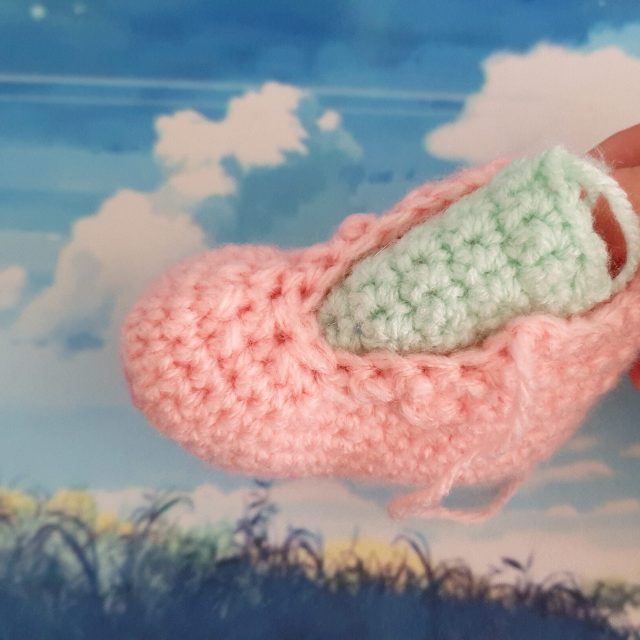
The tongue of the boot – Crochet Roller Skate
Ch4, starting the 2nd loop from the hook:
Row 1: 3 sc (3)
Row 2: 1 sc, sc inc, 1 sc (4)
R3: 1 sc, (sc inc) x 2, 1 sc (6)
R4 to 9: 6 sc (6)
R10: sc dec, 2 sc, sc dec (4)
Cut yarn and fasten off. Sew the tongue to its designed place, from the inside of the boot. Allow the upper edge of the tongue to extend beyond the top of the boot for a more realistic appearance.

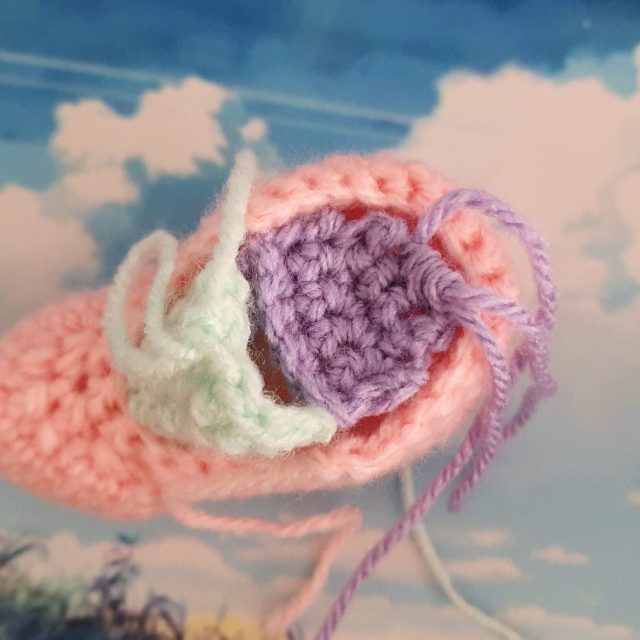
The Top Closure of the Boot
To secure the top of the boot after stuffing it with polyester fiber, we need to make a tiny piece to sew inside, grab your hook and with the same color as your boot:
Ch6, starting the 2nd loop from the hook:
Row 1 to 3: 5 sc (5)
R4: sc dec, 1 sc, sc dec (3)
R5: sc3tog (1)
Cut the yarn and leave a tail for sewing.

To seamlessly attach the small piece from the inside, start by positioning it along the inner edge of the shoe’s opening, skip the 1st top row and sew on the 2nd one. Stitch the rounded part of the small piece to the curved section of the boot, and secure the flat part to the tongue. Don’t forget to fill the shoe with the polyester fiber before!


The heel
Make a magic circle.
Round 1: 4 sc (4)
Round 2: 3 sc in each stitch (so 3 sc x 4) (12)
R3: sc inc, 3 sc, (3 sc in the next stitch), 2 sc, (3 sc in the next stitch), 3 sc, sc inc (18)
R4: BLO: 2 sc, sc inc, 12 sc, sc inc, 2 sc (20)
R5: 6 hdc, 1 sc, 6 sl st, 1 sc, 6 hdc (20)
Cut the yarn and leave a tail for sewing. Sew the heel to the boot by sewing the rounded part onto the corresponding rounded section of the sole. Ensure the flat part is oriented towards the front of the shoe. Don’t forget to fill the inside of the boot with some polyester fiber.


The plate of the skate – Crochet Roller Skate
Ch14, starting the 2nd loop from the hook:
Round 1: 12 sc, 3 sc in the last stitch, continue working on the other side the chain base: 11 sc, 2 sc in the last stitch (28)
Round 2: hdc inc, 2 hdc, 1 sc, 4 sl st, 1 sc, hdc inc, 2 hdc, 1 sc, (3 hdc in the next stitch), 1 sc, 2 hdc, hdc inc, 1 sc, 4 sl st, 1 sc, 2 hdc, hdc inc, 1 sc (34)
Cut the yarn and leave a tail for sewing. This is the sole part for the plate.

Grab your hook and yarn again and ch17, starting the 2nd loop from the hook:
Round 1: 15 sc, 3 sc in the last stitch, continue working on the other side the chain base: 14 sc, 2 sc in the last stitch (34)
Round 2: 34 sc (34)
Cut the yarn and fasten off. Take this piece, fold it in 2 and sew the top side together. After that, sew this to the plate’s sole we just made.


The wheels and the truck axles
The truck axles
Note that they should be the same color as the plate.
Make a magic circle.
Round 1 to 4: 6 sc (6)
Cut yarn and leave a tail for sewing. Make 4 of them.

The Wheels
Make a magic circle.
Round 1: 6 sc (6)
Round 2: sc inc x 6 (12)
R3: FLO 12 sc (12)
R4: 12 sc (12)
R5: BLO: (1 sc, sc inc) x6 (18)
R6: BLO 18 sc (18)
R7 to 8: 18 sc (18)
R9: BLO: (1 sc, sc dec) x6 (12)
R10: sc dec x 6 (6)


Cut the yarn and leave the middle hole open. Make 4 of them. Insert the top of a truck axle into the designated hole and, sew the wheel together with the truck. Do this to the 4 wheels. Then sew the 4 truck axles (and wheels) to the skate’s plate.

The Toe Stop
Make a magic circle.
Round 1: 5 sc (5)
Round 2: sc inc x 5 (10)
R3: 10 sc (10)
R4: 1 sc, sc dec, 2 sc, sc dec, 1 sc, sc dec (7)
Add 1 sc, then sc dec after round 4 then cut the yarn. Slightly fill the toe stop with some polyester fiber, then sew it on the front of the roller’s plate.


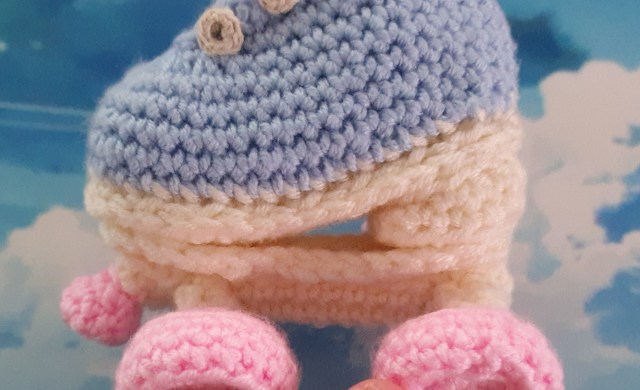
Sew the plate beneath the boot by sewing the front of the boot to the front of the plate and the heel to the back of the plate. However, refrain from sewing the middle of the boot directly onto the plate; maintain a gap to ensure that the middle section of the boot does not come into contact with the plate. This method ensures proper assembly while preserving the distinct shape of the boot.
The Pull Loop
Ch7, starting the 2nd loop from the hook:
Round 1: 5 sc, (3 sc in the last stitch), continue working on the other side of the chain base: 4 sc, (2 sc in the last stitch) (14)
Cut the yarn. Sew the top and bottom to fashion it into a shoe’s pull loop. Attach the keychain in it. Then sew the pull loop behind the boot, the rounded part being at the top.


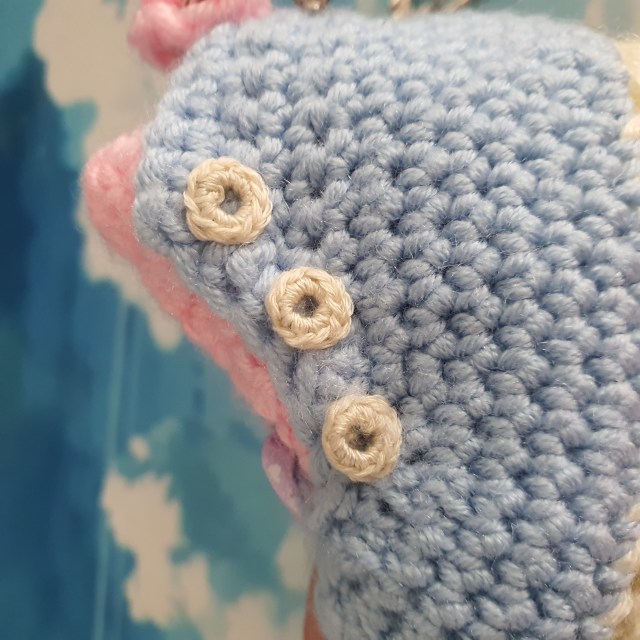
The boot’s eyelets
Gather your jump rings, a 1.75 mm crochet hook, and the DMC thread (using 3 strands). Begin by making a slipknot and joining the yarn to the jump ring with a single crochet. Work single crochets around the jump ring until it’s fully covered. Conclude with an invisible join and fasten off. Repeat this process six times in total. Finally, meticulously sew the six eyelets into their designated positions on the boot, 3 on each side.


The final touch, if you desire, is to embellish the eyelets with a charming ribbon lace.
As you tie off the last stitch on your Retro Roller Skate creation, remember that this pattern is just a glimpse into my world of crochet nostalgia. If you’ve caught the retro vibe bug, don’t forget to explore my other crochet patterns in the same groovy style – there’s a whole collection waiting for your creative touch here on my website.
Stay in the loop and follow me on my social media for sneak peeks, updates and more. Your feedback means the world to me, so drop a comment and share your thoughts – I’d love to hear about your retro-inspired creations and the memories they evoke. Until our next crochet rendez-vous, happy crocheting and keep those hooks busy!
The Full Video Crochet Tutorial!
The post Let’s Crochet This Colorful Roller Skate Keychain For Your Bag appeared first on Atelier Delilah.