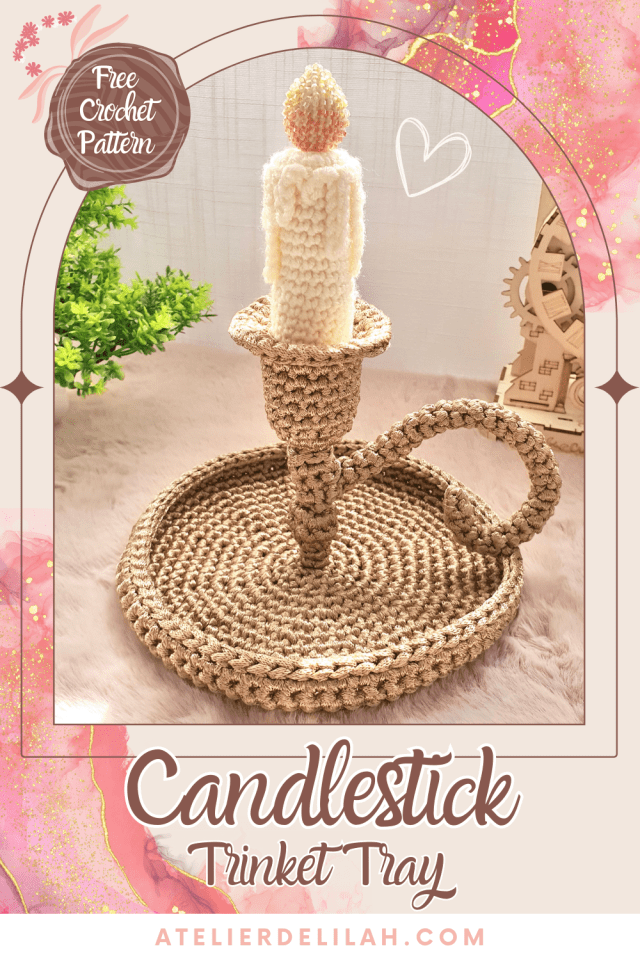
Warm Up Your Room with This Candlestick Crochet Pattern
- gracethrufaithgoods
- 05/08/2024
- DIY Tutorials
I’ve often been questioned about the sources of inspiration behind my designs, and how I craft the ideas that lead to the patterns I share. Today’s pattern beautifully encapsulates what ignites my creativity: my childhood. Immersed in the enchanting realms of princesses and fantasy worlds depicted in anime, I was mesmerized by the captivating scenes and intricate decor. The candlestick, a symbol of elegance and charm, was among the items that fueled my dreams. Thus, the notion to crochet one and transform it into a practical trinket tray emerged from these nostalgic musings. So let’s begin this Candlestick Crochet Pattern.
Material – Candlestick Crochet Pattern
- Gold Ribbon yarn, I used the Diva Iplik polypropylene ribbon yarn. I couldn’t find it on Amazon or anywhere else, so I found this substitute (or this color) you can use, or this one, or this one, or this one.
- Cream acrylic yarn
- Mercerized cotton thread lace weight
- a 2 mm, a 4 mm and 6 mm crochet hooks
- Orange and yellow little glass beads
- Beading needle
- Polyester fiberfill
- Craft wire 1,5 mm
- Yarn needle and stitch markers
** The words highlighted in blue are direct links to products on Amazon.com. As an Amazon Associate, I earn from qualifying purchases. This means that when you click on links to various products on this site and make a purchase, this can result in a commission that is credited to this site. This helps support the maintenance and growth of Atelierdelilah.Com, at no additional cost to you. Thank you for your support! **
Abbreviations
ch: chain
sc: single crochet
sl st: slip stitch
inc: increase
dec: decrease
FLO: front loops only
BLO: back loops only
R: round, row
Notes
Every rounds ends with a sl st in the 1st stitch of the round. Every row ends with a ch1 then turn.
The finished item dimensions are: 17,5 cm wide, 21,5 cm tall.
Gauge for the ribbon yarn: 10 cm x 10 cm= 15 sc x 16 rows
Gauge for the acrylic yarn: 5 cm x 5 cm= 10 sc x 10 rows
Candlestick Crochet Pattern
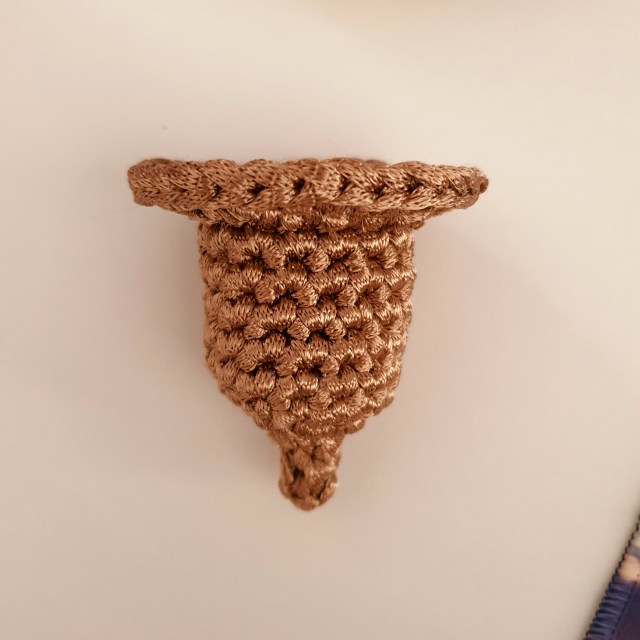
Top of the candlestick
Yarn: Ribbon
Hook: 6 mm
Start with a magic circle.
Round 1: 4 sc (4)
Round 2: BLO: 4 sc (4)
R3: sc inc x 4 (8)
R4: FLO: sc inc x 8 (16)
R5: FLO: 16 sc (16)
R6 to 10: 16 sc (16)
R11: FLO: (3sc, sc inc) x4 (20)
R12: (1 sc, sc inc) x 10 (30)
Cut the yarn and weave in the ends.
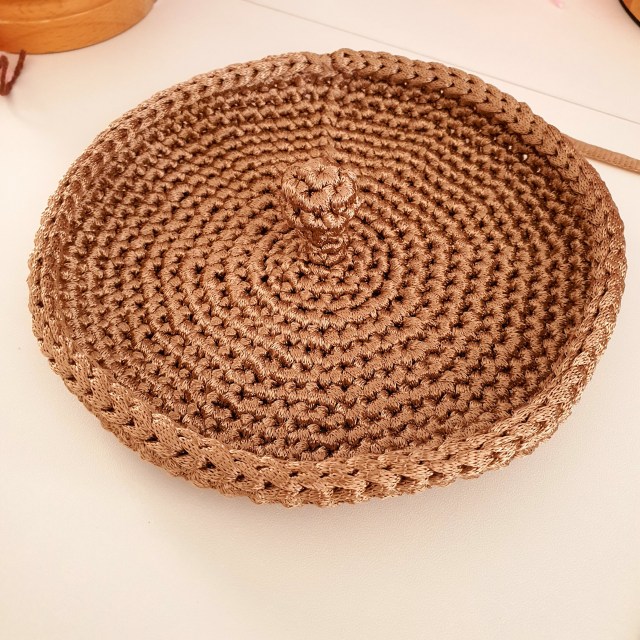
Bottom of the candlestick
Make a magic circle.
Round 1: 5 sc (5)
R2: sc inc x 5 (10)
R3: 10 sc (10)
R4: sc dec x 5 (5)
R5 to 6: FLO: 5 sc (5)
R7: FLO: sc inc x 5 (10)
R8: (1 sc, sc inc) x 5 (15)
R9: 15 sc (15)
R10: sc inc x 15 (30)
R11: (4 sc, sc inc) x 6 (36)
R12: (5 sc, sc inc) x 6 (42)
R13: (6 sc, sc inc) x 6 (48)
R14: (7 sc, sc inc) x 6 (54)
R15: (8 sc, sc inc) x 6 (60)
R16: (9 sc, sc inc) x 6 (66)
R17: 66 sc (66)
R18: (10 sc, sc inc) x 6 (72)
R19 to 21: 72 sc (72)
Ch 1 then turn the bottom to sl st on the outer side of it:
R22: 72 sl st (72)
Cut the yarn, finish the round with an invisible join and weave in the ends.
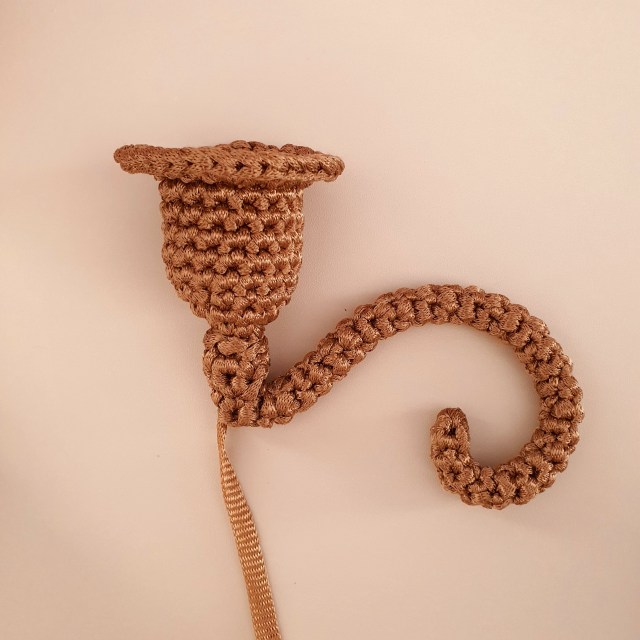
The Handle – Candlestick Crochet Pattern
Make a magic circle. For this one, we will not join the rounds with a sl st, we will work the rounds in the amigurumi method.
Round 1 to 31: 4 sc (4)
At the end of the round 31, chain 5, then for the next row, start the 2nd loop from the hook and:
Row 32: 4 sc (4)
Row 33: 4 sc (4)
R34: sc inc, 2 sc, sc inc (6)
R35: 6 sc (6)
Cut the yarn and leave a tail for sewing.


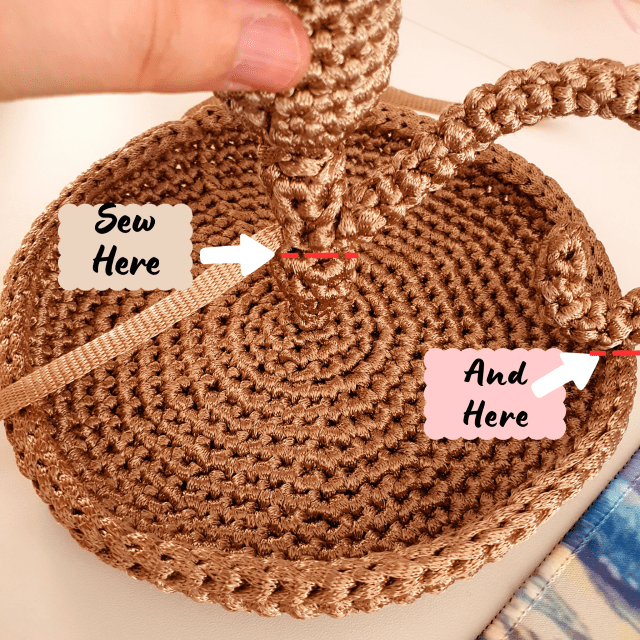
Insert the craft wire inside the handle, then sew the top of the candlestick to the handle as shown in the pictures below.


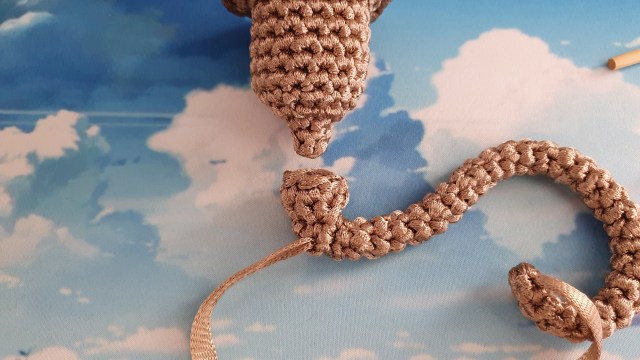
Encircle the tip of the handle around the bottom of the candlestick’s top, then securely stitch them together.
Sew the top of the candlestick to the bottom we’ve made earlier.
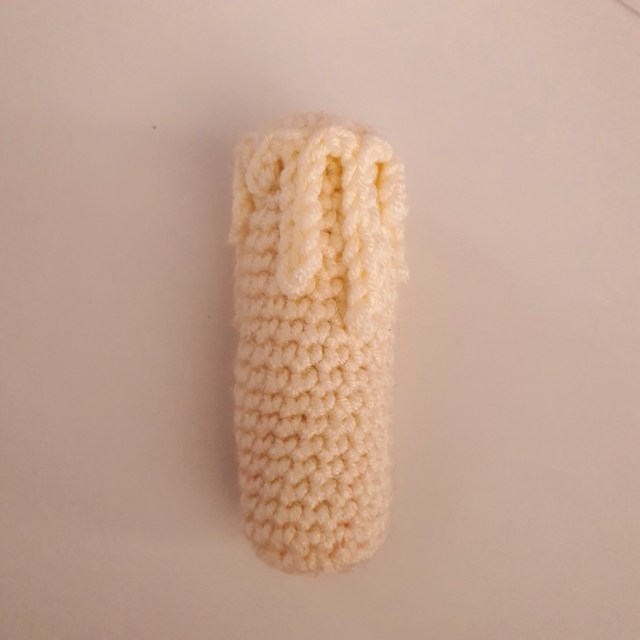
The Candle – Candlestick Crochet Pattern
Yarn: Acrylic
Hook: 4 mm
Make a magic circle.
Round 1: 6 sc (6)
R2: sc inc x 6 (12)
R3: (1 sc, sc inc) x 6 (18)
R4 to 21: 18 sc (18)
Fill the candle with the polyester fiberfill.
R22: (1 sc, sc dec) x 6 (12)
R23: sc dec x 6 (6)
Cut the yarn, close the hole with a yarn needle. Weave in the ends.

Candle drips
Make a magic circle.
Round 1: 6 sc (6)
R2: sc inc x 6 (12)
R3: (1 sc, sc inc) x 6 (18)
R4: Ch 6, 2nd loop from the hook: 5 sl st in the chain6,
2 sl st in the next 2 free stitches,
Ch 3, 2nd loop from the hook: 2 sl st in the chain3,
2 sl st in the next 2 free stitches,
Ch 5, 2nd loop from the hook: 4 sl st in the chain5,
2 sl st in the next 2 free stitches,
Ch 9, 2nd loop from the hook: 8 sl st in the chain9,
2 sl st in the next 2 free stitches,
Ch 4, 2nd loop from the hook: 3 sl st in the chain4,
2 sl st in the next 2 free stitches,
Ch 2, 2nd loop from the hook: 1 sl st in the chain2,
2 sl st in the next 2 free stitches,
Ch 6, 2nd loop from the hook: 5 sl st in the chain6,
2 sl st in the next 2 free stitches,
Ch 8, 2nd loop from the hook: 7 sl st in the chain8,
2 sl st in the next 2 free stitches,
Ch 4, 2nd loop from the hook: 3 sl st in the chain4,
1 sl st in the next free stitch,
Then cut the yarn and finish the round with an invisible join.
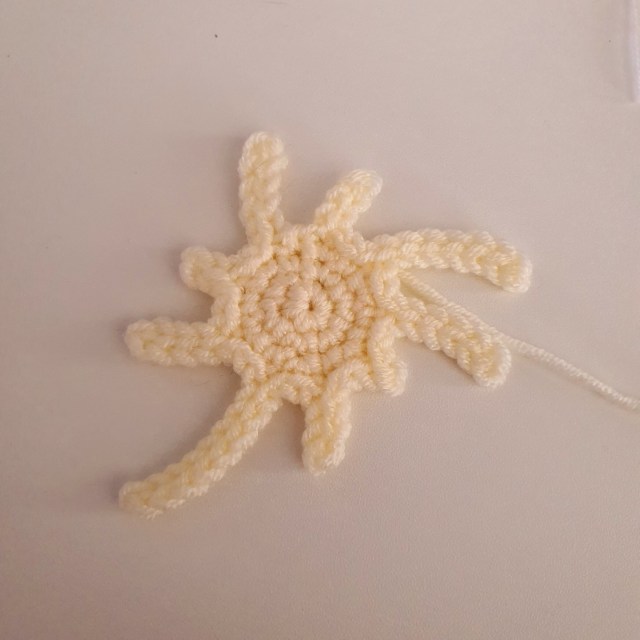
Sew the drips on top of the candle.
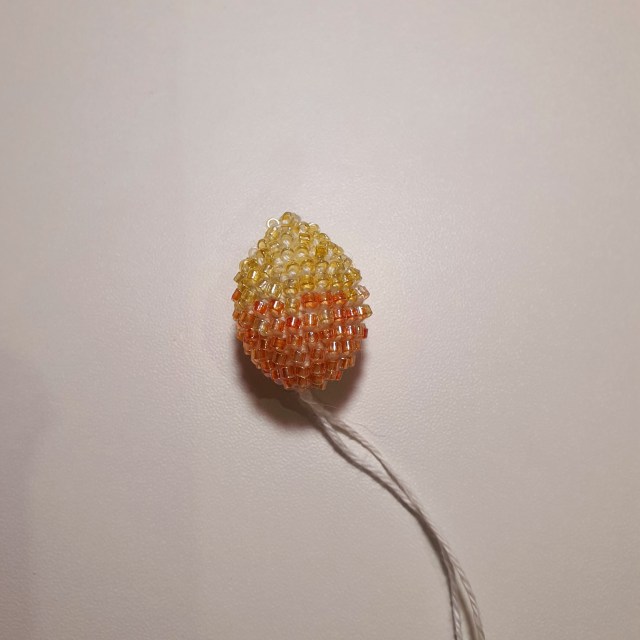
The flame
Yarn: mercerized cotton thread
Hook: 2 mm
To begin, gather your beads and thread them onto the string. You’ll require 114 orange beads and 84 yellow beads in total.
Arrange your beads in the following sequence to match the pattern:
Start by threading 72 yellow beads, followed by the sequence: {(1 yellow, 3 oranges) x 6}, 2 oranges, 1 yellow, {(3 oranges, 1 yellow) x 5}, and finally, 79 oranges.


Please note that the whole flame is worked in the BACK LOOPS ONLY of the stitches.
Make a magic circle. For each stitch, incorporate a bead. Keep in mind that when decreasing, use two beads for each decrease stitch.
Round 1: 6 sc (6)
R2: sc inc x 6 (12)
R3: (1 sc, sc inc) x 6 (18)
R4: 18 sc (18)
R5: (2 sc, sc inc) x 6 (24)
R6 to 8: 24 sc (24)
R9: (2 sc, sc dec) x 6 (18)
Fill the flame with the polyester fiberfill.
R10: (1 sc, sc dec) x 6 (12)
R11: sc dec x 4, 4 sc (8)
R12: sc dec x 4 (4)
Cut the yarn and close the hole. Sew the flame on the top of the candle.

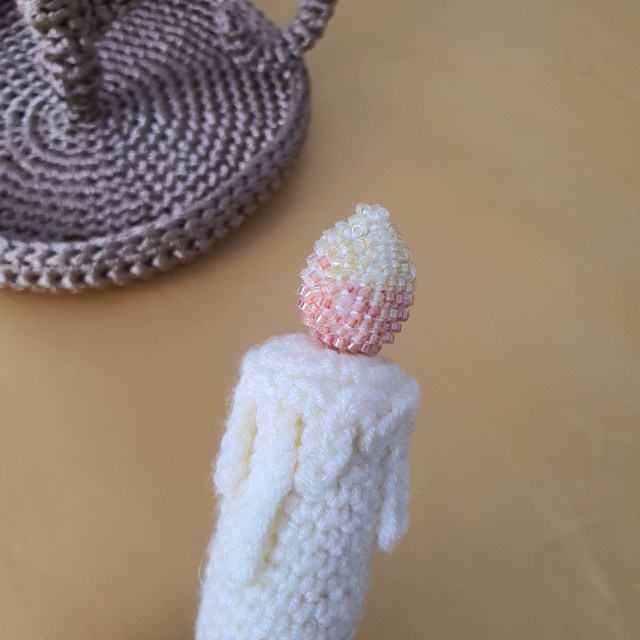
To finish
Simply place your candle into the candlestick, and your project is complete! Congratulations on crocheting this exceptionally unique and elegant trinket tray. Now, whenever you empty your pockets or remove your jewelry, revel in the regal feeling—fit for a princess!

The crochet candlestick trinket tray doesn’t just bring an old-world charm and whimsical elegance to your living space; it also sets the stage for a cozy atmosphere that beckons relaxation and comfort.
As we conclude this pattern, I extend a warm invitation to join me on Instagram for more crochet inspiration and updates. Let’s stay connected and see you in the next one!
The post Warm Up Your Room with This Candlestick Crochet Pattern appeared first on Atelier Delilah.