Sun, Sand, and Stitches: Crochet Now This Palm Tree Sign
- gracethrufaithgoods
- 05/08/2024
- DIY Tutorials
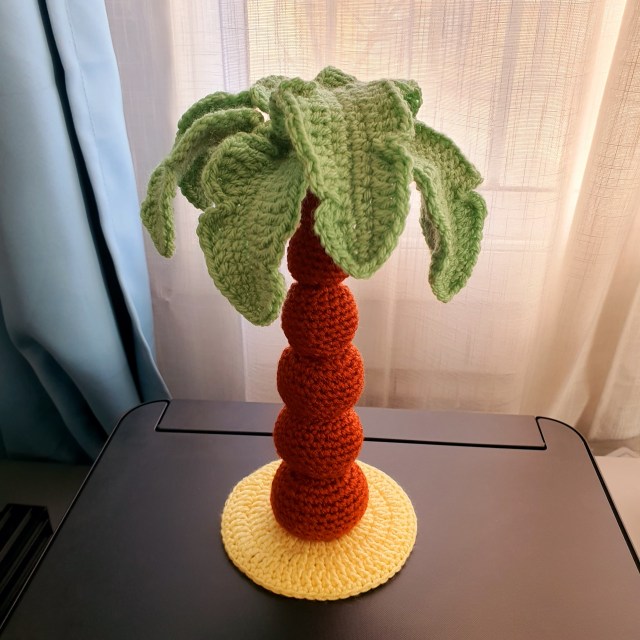
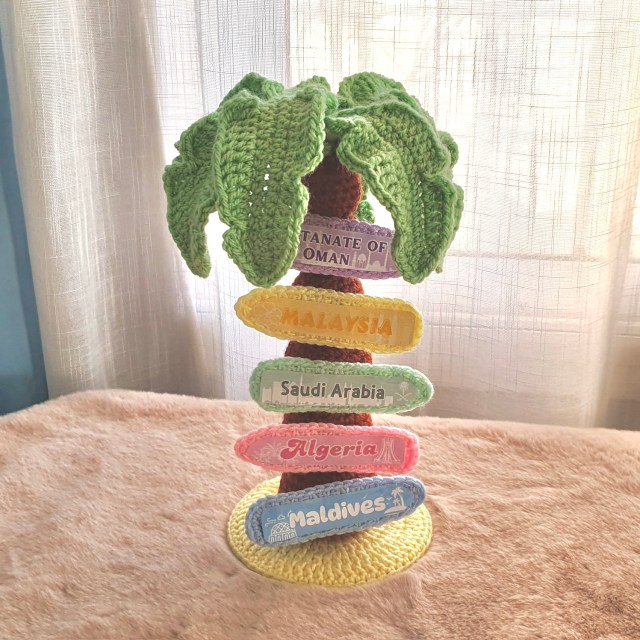
With summer on the horizon, I’ve imagined the perfect desk accessory to get you in the vacation spirit or evoke fond memories of past travels: the Crochet Palm Tree Sign or Directional Post. Palm trees hold a special place in my heart as my favorite plant. Their swaying fronds never fail to bring a sense of calm and serenity to my soul. That’s precisely why I chose them over a plain wooden post for this pattern. My hope is that this design will bring you the same tranquility and joy it brings me. So, without further ado, let’s crochet this colorful desk decor, shall we?
Material – Crochet Palm Tree Sign
- Acrylic or cotton yarn medium 4 weight (1 skein should be enough) for each color: green, brown and yellow.
- Acrylic or cotton yarn light DK weight (1 skein is def enough) for each color: blue, pink, yellow, mint, purple.
- A 4 mm crochet hook
- Stainless craft wire 2 mm
- Jewelry craft wire 0,6 mm
- Polyester fiberfill for stuffing
- A piece of balsa wood
- Clear vinyl sheet easy to sew (0,1 mm thickness)
- Threads the same colors as your arrow pannels
- a A4 paper and a printer
** The words highlighted in blue are direct links to products on Amazon.com. As an Amazon Associate, I earn from qualifying purchases. This means that when you click on links to various products on this site and make a purchase, this can result in a commission that is credited to this site. This helps support the maintenance and growth of Atelierdelilah.Com, at no additional cost to you. Thank you for your support! **
Abbreviations – Crochet Palm Tree Sign
ch: chain
sl st: slip stitch
sc: single crochet
hdc: half double crochet
dc: double crochet
tr: treble crochet
inc: increase
dec: decrease
R: round / row
Crochet Palm Tree Sign or Directionnal Post Pattern
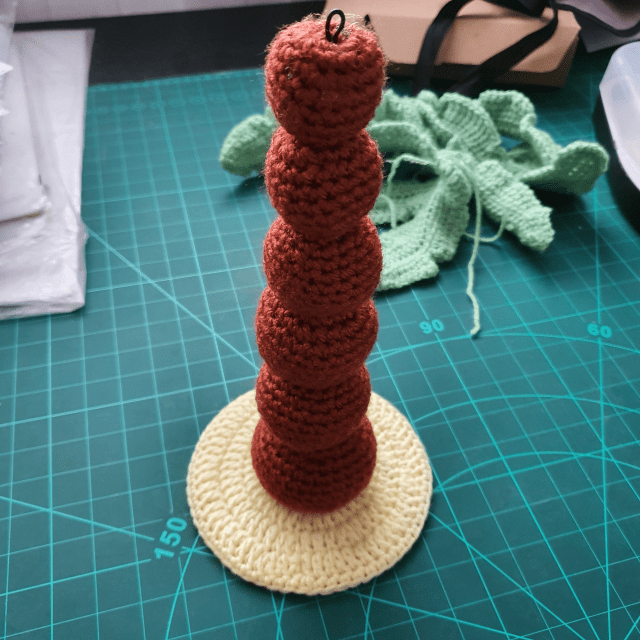
Palm Tree Trunk
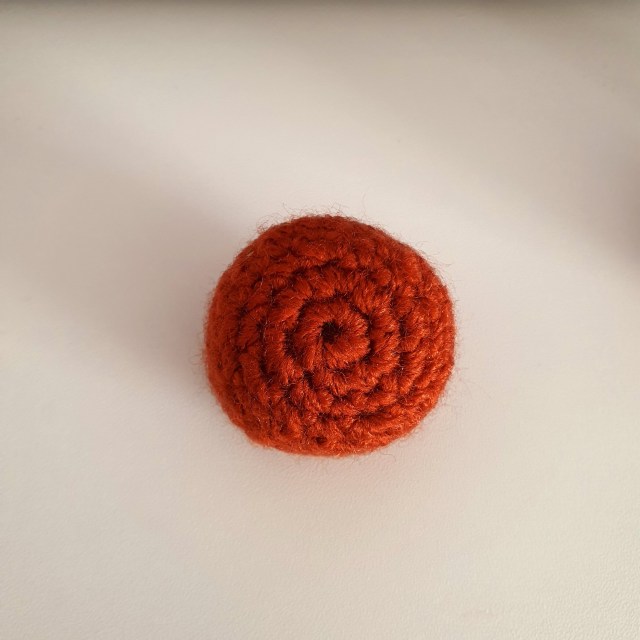
For this design, the trunk of the palm tree consist of 6 amigurumi balls of different size. We will start the pattern from the larger to the smaller ball.
Please absolutely note that the magic circle should NOT be closed tight at the end of round 1, each time. You should leave a small hole open for the insertion of the 2mm craft wire later on. Similarly, when finishing each ball, refrain from closing the top hole too tightly; always maintain a small opening for the wire.
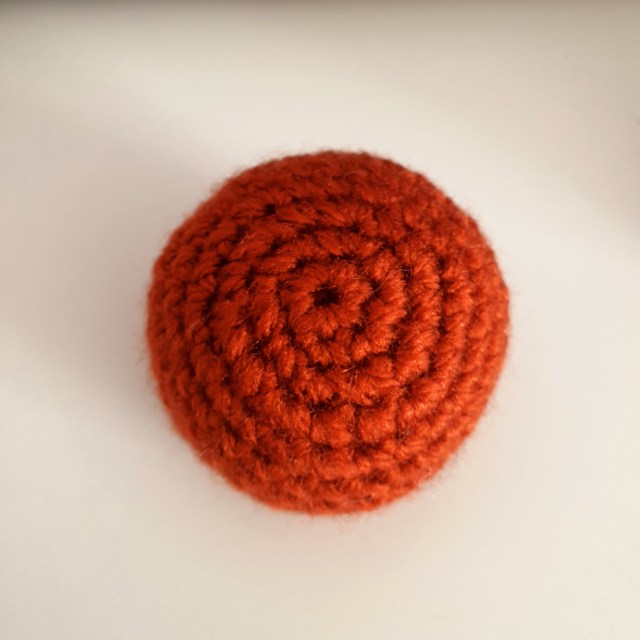
Ball 1
Make a magic circle.
Round 1: 6 sc (6)
Round 2: sc inc x 6 (12)
R3: (1 sc, sc inc) x6 (18)
R4: (2 sc, sc inc) x6 (24)
R5: (3 sc, sc inc) x6 (30)
R6 to 11: 30 sc (30)
R12: (3 sc, sc dec) x6 (24)
R13: (2 sc, sc dec) x6 (18)
R14: (1 sc, sc dec) x6 (12)
Fill the ball with the polyester fiberfill.
R15: sc dec x6 (6)
Cut the yarn and close the hole a little bit, leaving a space for the wire.
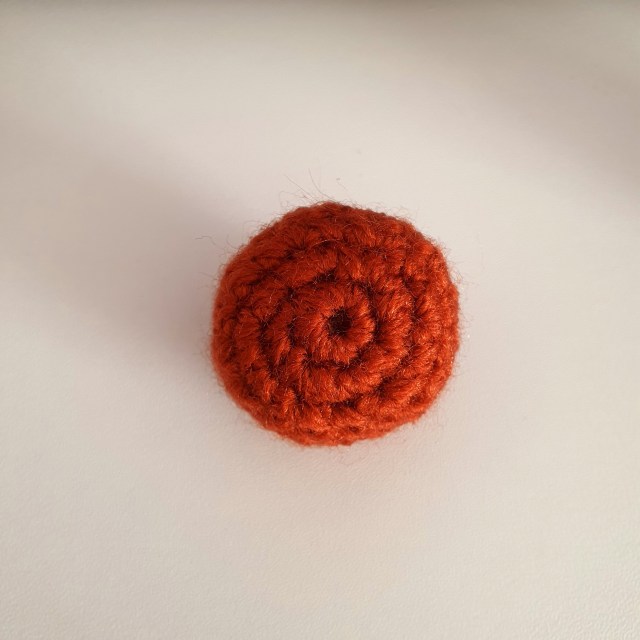
Ball 2
Make a magic circle.
Round 1: 6 sc (6)
Round 2: sc inc x 6 (12)
R3: (3 sc, sc inc) x3 (15)
R4: (4 sc, sc inc) x3 (18)
R5: (5 sc, sc inc) x3 (21)
R6: (6 sc, sc inc) x3 (24)
R7: (7 sc, sc inc) x3 (27)
R8 to 9: 27 sc (27)
R10: (7 sc, sc dec) x3 (24)
R11: (6 sc, sc dec) x3 (21)
R12: (5 sc, sc dec) x3 (18)
R13: (4 sc, sc dec) x3 (15)
R14: (3 sc, sc dec) x3 (12)
Fill the ball with the polyester fiberfill.
R15: sc dec x6 (6)
Cut the yarn and close the hole a little bit, leaving a space for the wire.
Ball 3
Make a magic circle.
Round 1: 6 sc (6)
Round 2: sc inc x 6 (12)
R3: (1 sc, sc inc) x6 (18)
R4: (2 sc, sc inc) x6 (24)
R5 to 10: 24 sc (24)
R11: (2 sc, sc dec) x6 (18)
R12: (1 sc, sc dec) x6 (12)
Fill the ball with the polyester fiberfill.
R13: sc dec x6 (6)
Cut the yarn and close the hole a little bit, leaving a space for the wire.
Ball 4
Make a magic circle.
Round 1: 6 sc (6)
Round 2: sc inc x 6 (12)
R3: (3 sc, sc inc) x3 (15)
R4: (4 sc, sc inc) x3 (18)
R5: (5 sc, sc inc) x3 (21)
R6 to 9: 21 sc (21)
R10: (5 sc, sc dec) x3 (18)
R11: (4 sc, sc dec) x3 (15)
R12: (3 sc, sc dec) x3 (12)
Fill the ball with the polyester fiberfill.
R13: sc dec x6 (6)
Cut the yarn and close the hole a little bit, leaving a space for the wire.
Ball 5
Make a magic circle.
Round 1: 6 sc (6)
Round 2: sc inc x 6 (12)
R3: (1 sc, sc inc) x6 (18)
R4 to 8: 18 sc (18)
R9: (1 sc, sc dec) x6 (12)
Fill the ball with the polyester fiberfill.
R10: sc dec x6 (6)
Cut the yarn and close the hole a little bit, leaving a space for the wire.
Ball 6
Make a magic circle.
Round 1: 6 sc (6)
Round 2: sc inc x 6 (12)
R3: (2 sc, sc inc) x4 (16)
R4 to 7: 16 sc (16)
R8: (2 sc, sc dec) x4 (12)
Fill the ball with the polyester fiberfill.
R9: sc dec x6 (6)
Cut the yarn and close the hole a little bit, leaving a space for the wire.
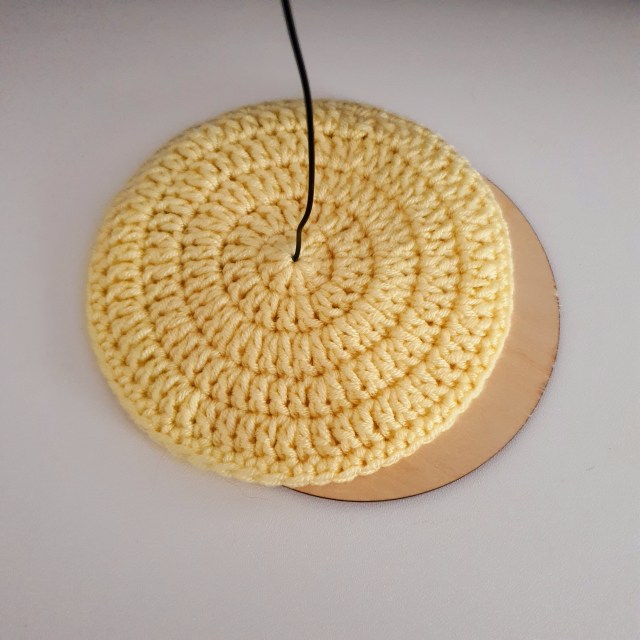
The Sand – Crochet Palm Tree Sign
Make a magic circle.
Round 1: 10 dc (10)
Round 2: dc inc x10 (20)
R3: dc inc x 20 (40)
R4: (3 dc, dc inc) x 10 (50)
R5: (4 dc, dc inc) x 10 (60)
R6: 60 sc (60)
Cut the yarn and fasten off.

Cut a round piece of balsa wood to match the size of your sand (approximately 9.8 cm in diameter).

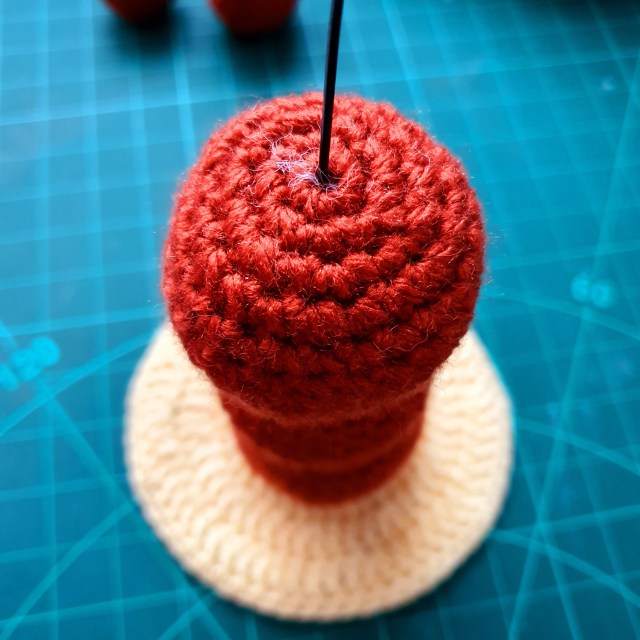
Place the 2 mm wire in the center of your sand (through the center of the magic circle). Leave a portion of the wire protruding beneath the sand, shaping it to fit the round form, and secure it with glue. Insert the round balsa wood piece beneath the sand, then firmly affix it with glue. Make sure to glue the last round of the sand, around the balsa wood to perfectly hide it.


After securing the wire, proceed to attach the palm tree trunk to the sand. Slide each ball, from ball 1 (larger one) to ball 6 (smaller one), through the wire and bond them together using hot glue.
To conceal the top of the wire within the uppermost ball and prevent it from protruding, carefully embed the wire into the ball.
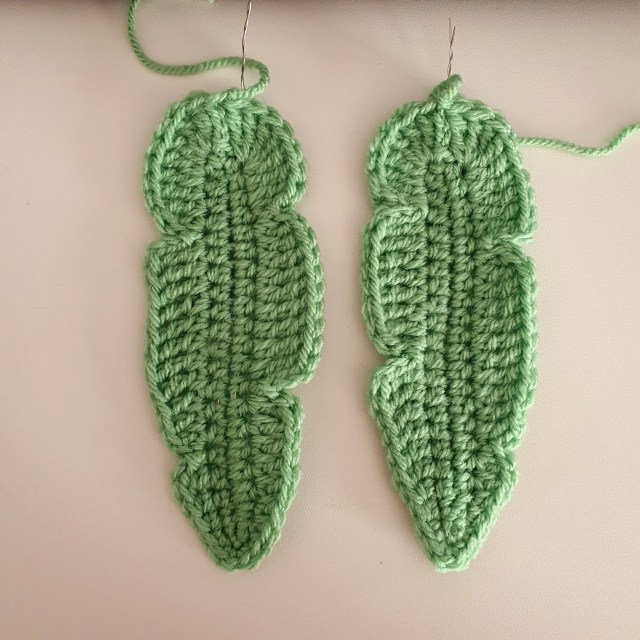
The Palm Tree’s Fronds – Crochet Palm Tree Sign
We’ll create two types of frond designs: the pattern will be mirrored from the 1st Frond for the second design.
Frond 1 (make 4)
Ch 21, and starting the 2nd loop from the hook:
Grab your 0,6 mm craft wire and work your 1st round around it. Note that you have to let a tail of wire extending from the frond, as it will be used later to connect them together.


Round 1: 18 hdc, 1 sc, 3 sc in the last stitch of the chain, continue working on the other side of the chain base: 1 sc, 18 hdc (41)
Round 2: ch 3, 4 tr in the 1st stitch, tr inc, 2 tr, (1 tr, ch1, sl st) in the next stitch, ch 3, continue working in the next free stitch: 8 tr, 2 dc, (1 dc, ch1, sl st) in the next stitch, ch 2, continue working in the next free stitch: 1 dc, 2 hdc, 1 sc, (1 sc, ch1, 1 sc) in the next stitch, 1 sc, 2 hdc, 4 dc, 1 tr, (1 tr, ch1, sl st) in the next stitch, ch3, continue working in the next free stitch: 8 tr, (1 tr, ch1, sl st) in the next stitch, ch 3, continue working in the next free stitch: tr inc, 5 tr in the last stitch. Sl st in the first tr of the round.
Cut the yarn and weave in the ends.
Frond 2 (make 4)
Ch 21, starting the 2nd loop from the hook (and still working the 1st round around the wire):
Round 1: 18 hdc, 1 sc, 3 sc in the last stitch of the chain, continue working on the other side of the chain base: 1 sc, 18 hdc (41)
Round 2: ch 3, 4 tr in the 1st stitch, tr inc, (1 tr, ch1, sl st) in the next stitch, ch 3, continue working in the next free stitch: 7 tr, (1 tr, ch1, sl st) in the next stitch, ch 3, continue working in the next free stitch: 2 tr, 4 dc, 2 hdc, 1 sc, (1 sc, ch1, 1 sc) in the next stitch, 1 sc, 2 hdc, 1 dc, (1 dc, ch1, sl st) in the next stitch, ch 2, continue working in the next free stitch: 2 dc, 8 tr, (1 tr, ch1, sl st) in the next stitch, ch 3, continue working in the next free stitch: 2 tr, tr inc, 5 tr in the last stitch. Sl st in the first tr of the round.
Cut the yarn and weave in the ends.
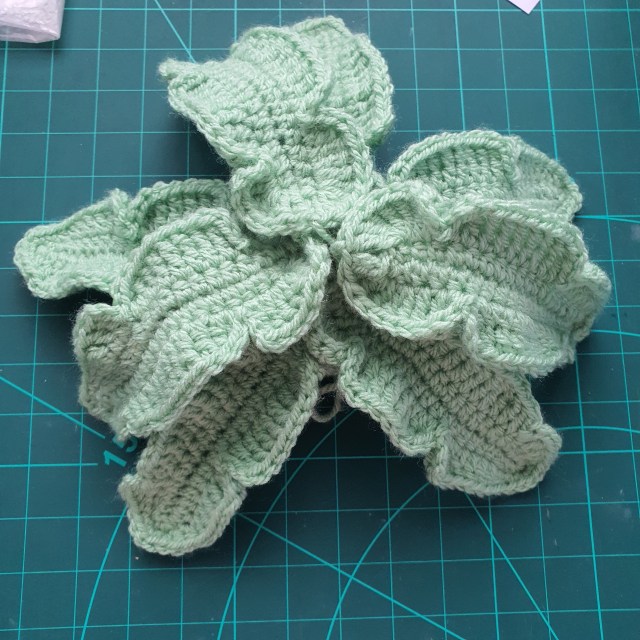
Connect the Fronds together
To tie the fronds together pick 5 leaves and twist the dangling wires together, following the illustrated example below.

Then add the 3 remaining fronds to the top and twirl again the wire all together.
Attach the fronds to the upper ball of the trunk by threading the wires through the top aperture, then sewing or gluing them in place.
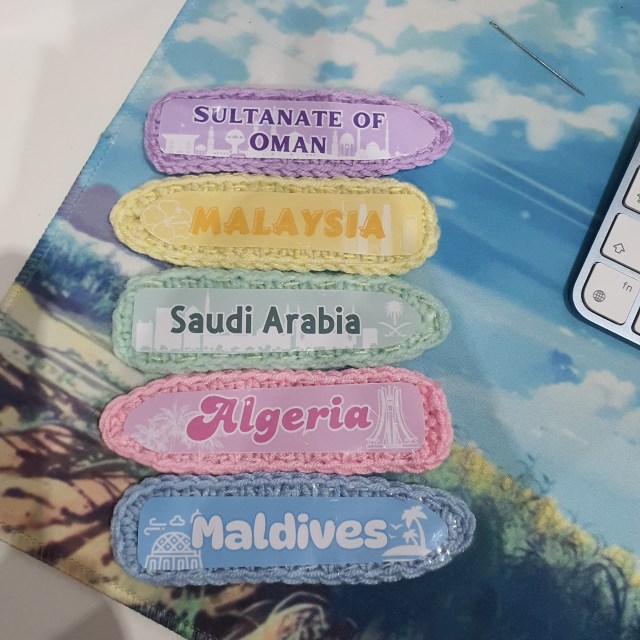
The sign panels
Ch 2, then in the 1st loop of the chain:
Row 1: 1 sc (1), ch 1 then turn.
Row 2: 3 sc in the only stitch (3), ch 1 then turn.
R3 to 18: 3 sc (3), ch 1 then turn.

Now we will work the edges. Grab the 0,6 mm craft wire and work the round around it:

Round 19: ch1, sc around: 16 sc, when you reach the pointy tip make a (1 sc, ch1, 1 sc), continue working the other side: 16 sc, ch 1, 3 sc, ch 1 and end the round with an invisible join. Cut the yarn and weave in the ends.

Cut the vinyl sheet to match the shape of the arrow panel, ensuring it fits snugly onto the panel we’ve just created. Then, use DMC thread to sew the vinyl sheet securely onto the panel.


Create five of these panels. Print out the names of the countries or places you’ve visited or want to visit, and slide each piece of paper under the vinyl sheet. I personnaly used Canva to make the designs for the panels. Finally, either glue or sew the panels onto the palm tree. And there you have it!
Remember to drop a comment to share your thoughts on this cool project, perfect for adding a touch of charm to your desk decor and sparking anticipation for your next getaway. If you enjoyed it, why not spread the word by sharing this article on your social media? While I don’t usually ask, it would mean the world to me and help more people discover my website and enjoy my free crochet patterns. Don’t forget to follow me on Instagram and share photos of your finished pieces—I can’t wait to see them! Until next time, happy crocheting!
The post Sun, Sand, and Stitches: Crochet Now This Palm Tree Sign appeared first on Atelier Delilah.